 Conditioning Control Panel
Overview
Deeper adds a layer on top of a piece of media. The layer is a small file with a .ccpenh.json extension, and it holds everything: the timings, the haptics, the rules. Hand that file to anyone running CCP and they get the same experience you built.
Two halves:
- The Player - loads media plus an enhancement and runs them together. Haptics, effects and rules fire as the media plays.
- The Editor - where you build it. Drop effects on a timeline, mark out regions, attach rules to triggers like gaze or blinks. Save as a portable file, or bundle it straight into the media.
What it accepts
- Local video: MP4, WEBM, MKV, MOV, AVI, M4V
- Local audio: MP3, WAV, M4A, AAC, FLAC, OGG
- Remote video URLs: HypnoTube and similar embed-friendly sources
Free feature
Deeper costs nothing and needs no subscription. Neither does the webcam setup it uses for gaze triggers. The 🎓 button in the Deeper tab reopens the walkthrough whenever you want it.
In-App Tutorial
The fastest way to learn Deeper is to let it show you. Open the Deeper Editor and hit the 🎓 button next to the title. Eight steps, about a minute, over the real UI:
Step 1 - The Editor
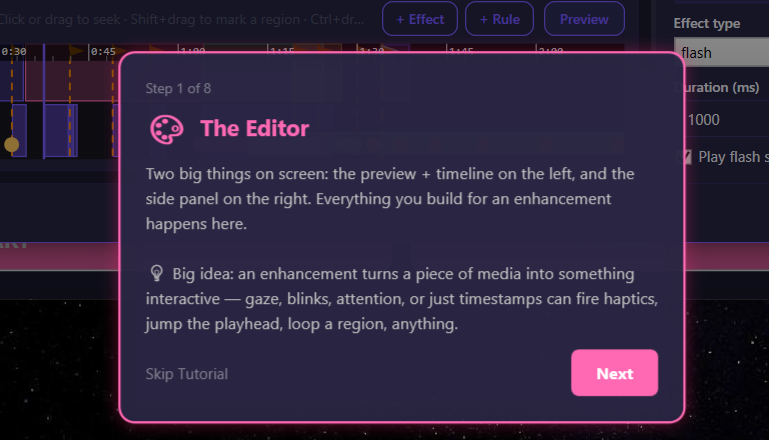
Preview and timeline on the left, side panel on the right. That's the whole surface.
Step 2 - Timeline
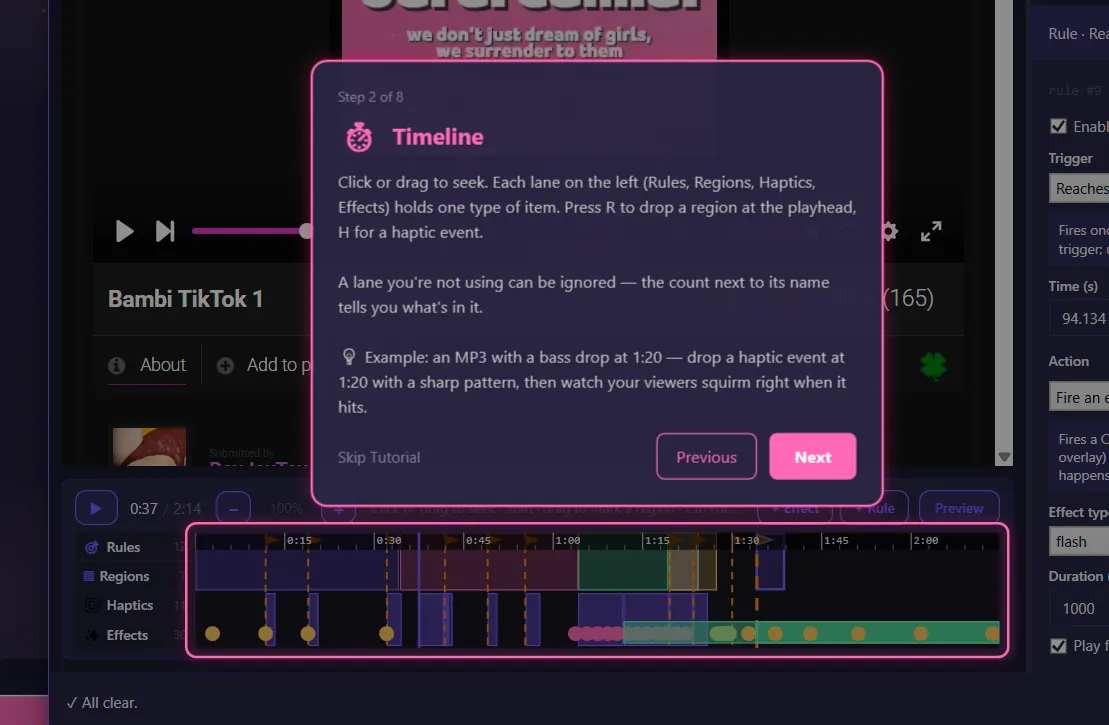
Each lane (Rules, Regions, Haptics, Effects) holds one kind of thing. R drops a region, H drops a haptic event.
Step 3 - Preview Mode
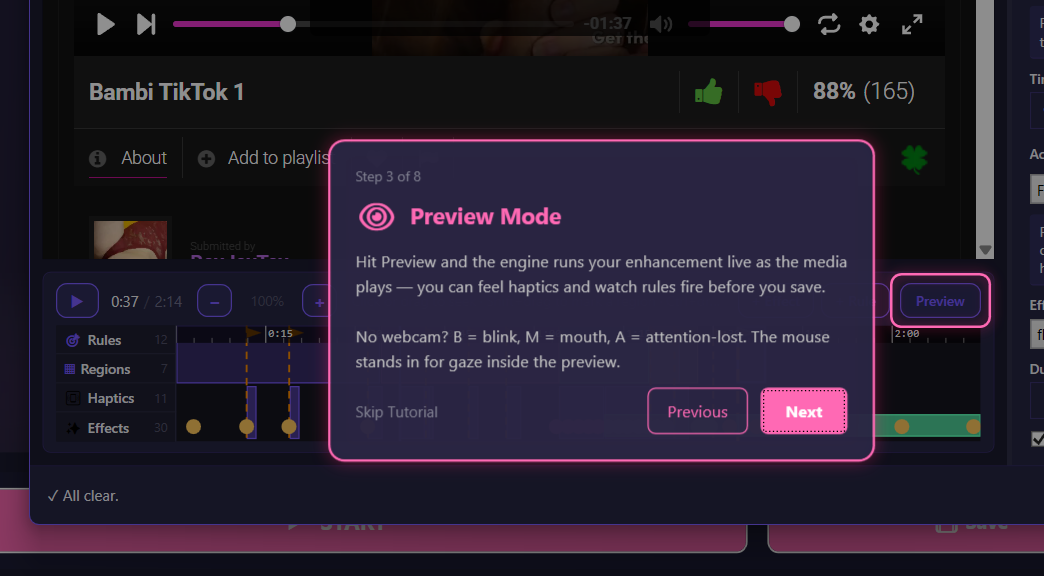
Hit Preview and feel it live. No webcam? B, M and A stand in for blink, mouth and attention-lost, and the mouse stands in for your gaze.
Step 4 - Metadata
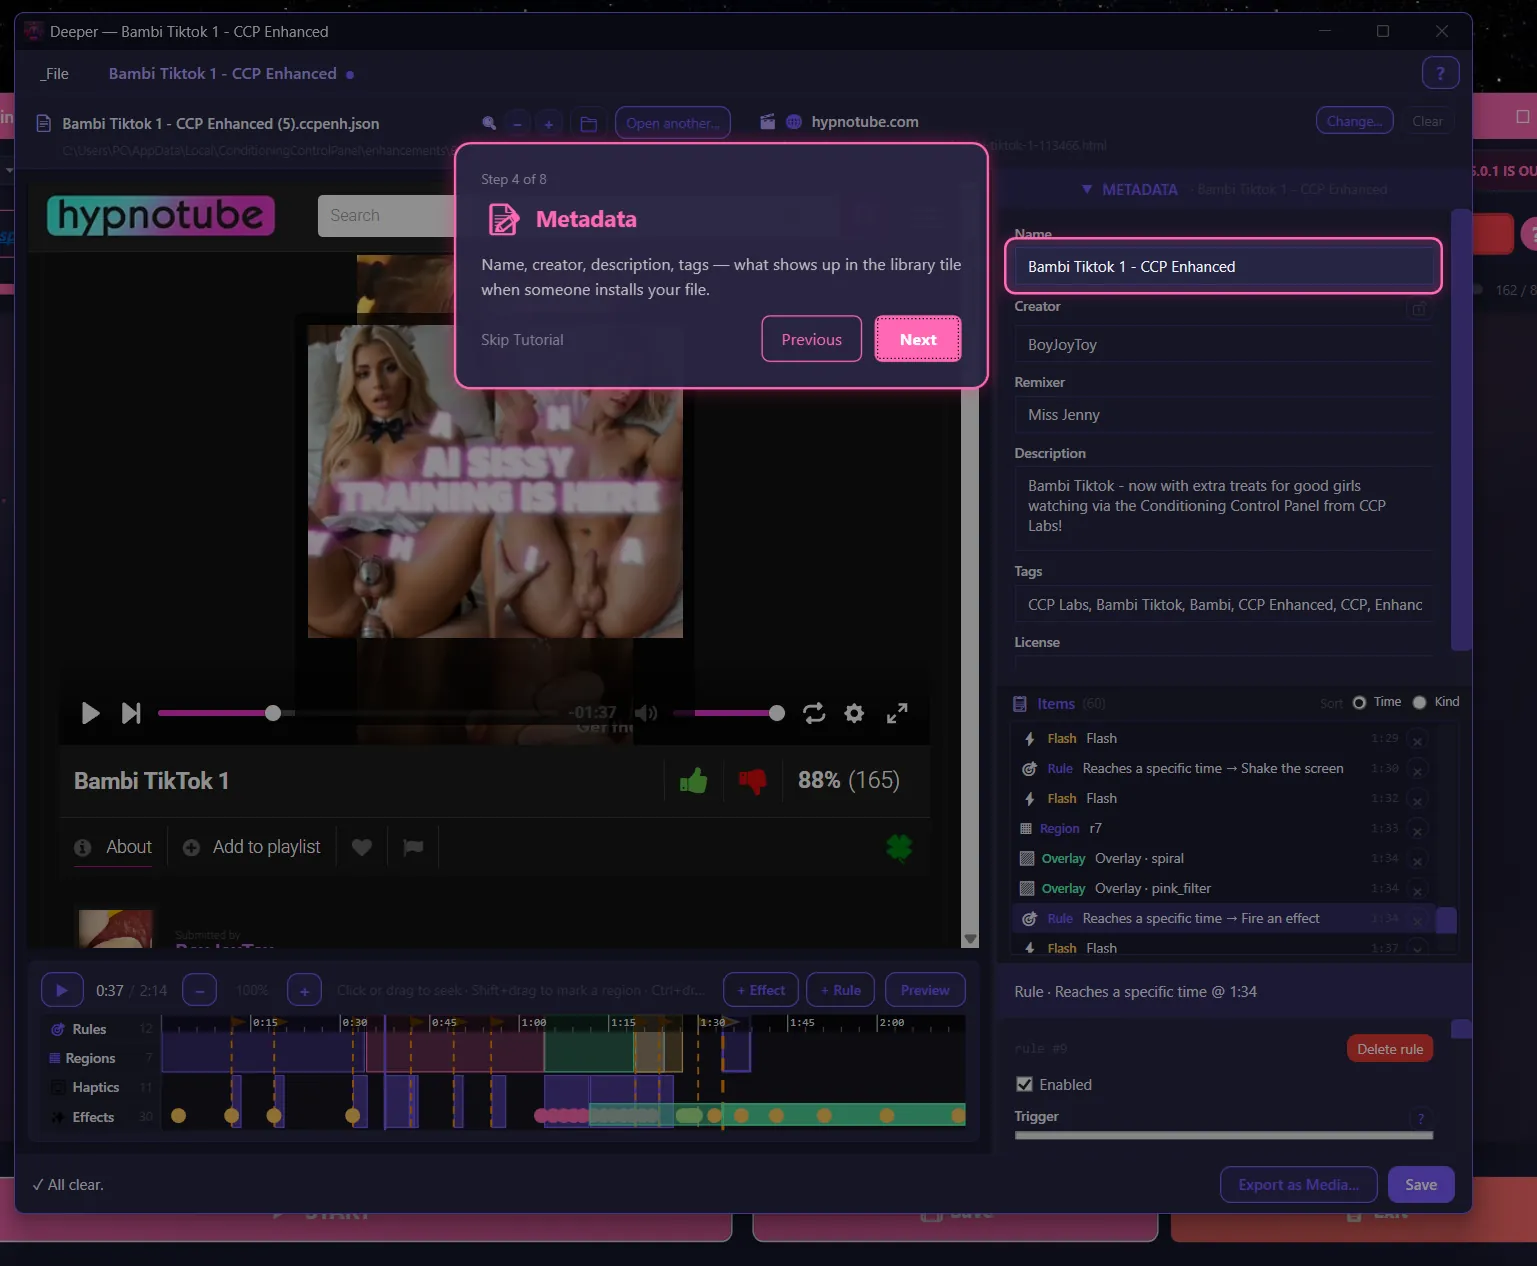
Name, creator, description, tags. This is what someone sees in their library when they open your file.
Step 5 - Rules
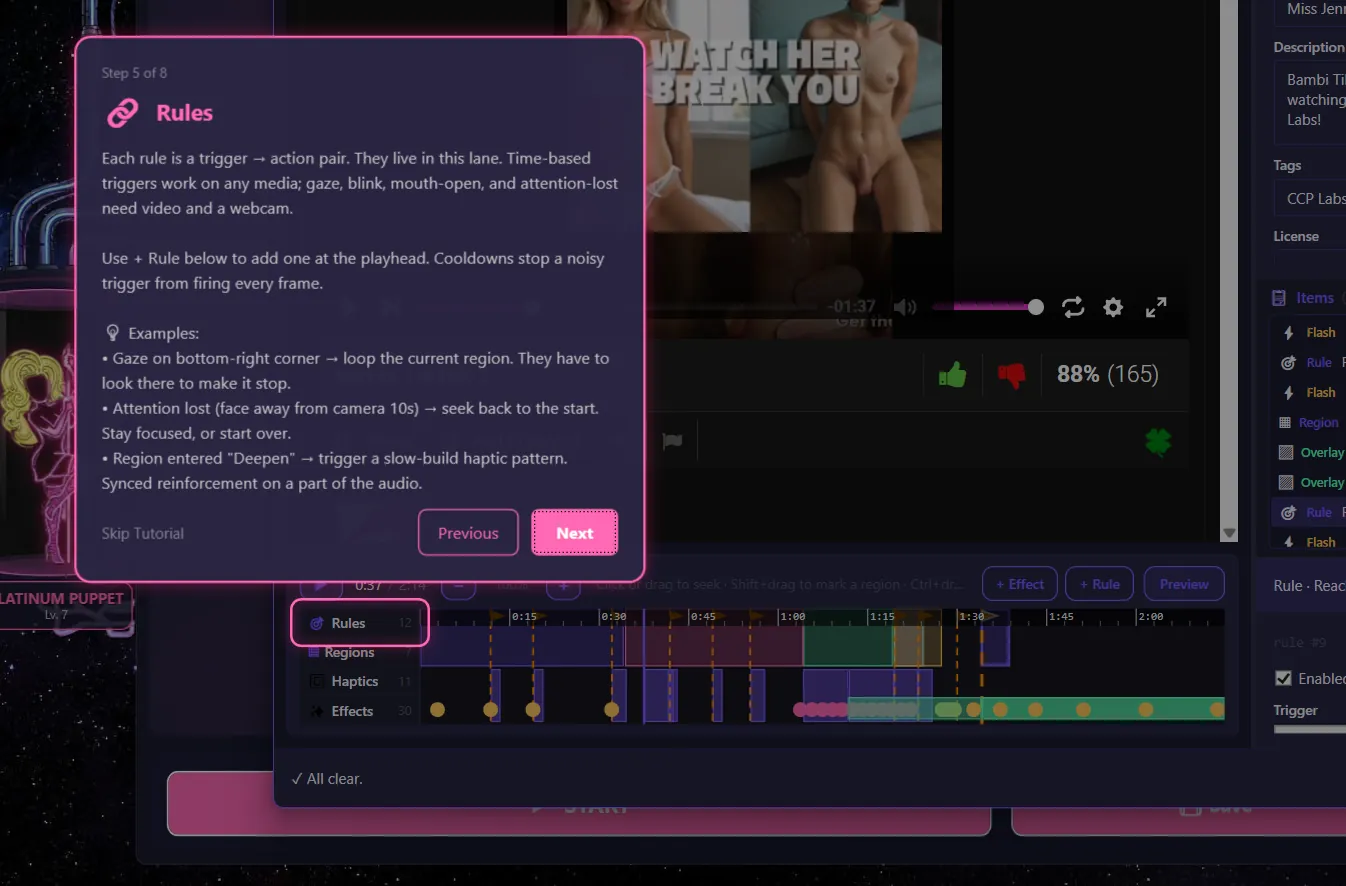
A rule is one trigger and one action. Time-based rules work on anything; gaze and blink rules need video and a camera. Cooldowns stop them spamming.
Step 6 - Selected
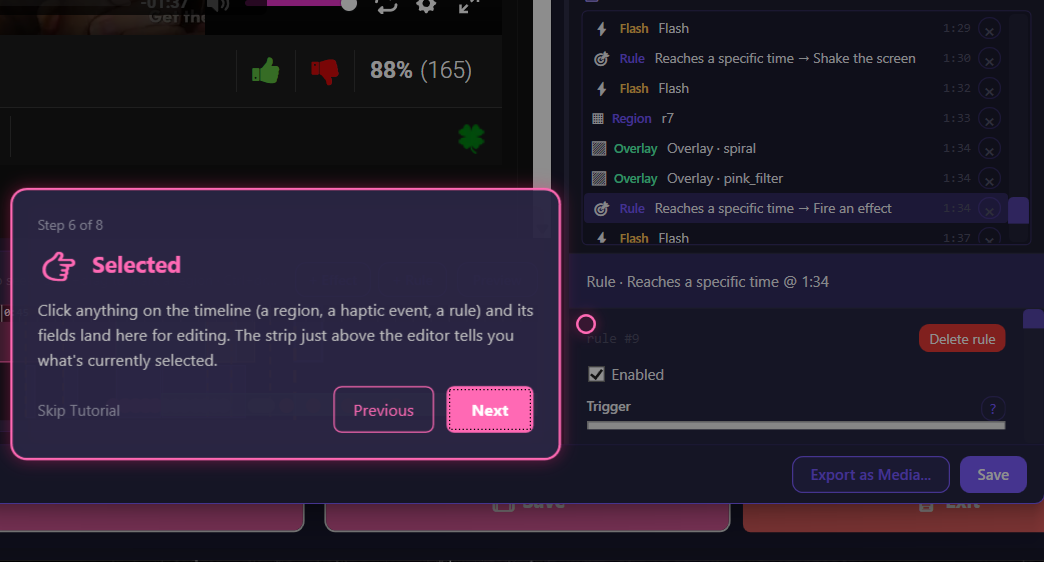
Click anything on the timeline and its settings appear in the side panel.
Step 7 - Save & Validate
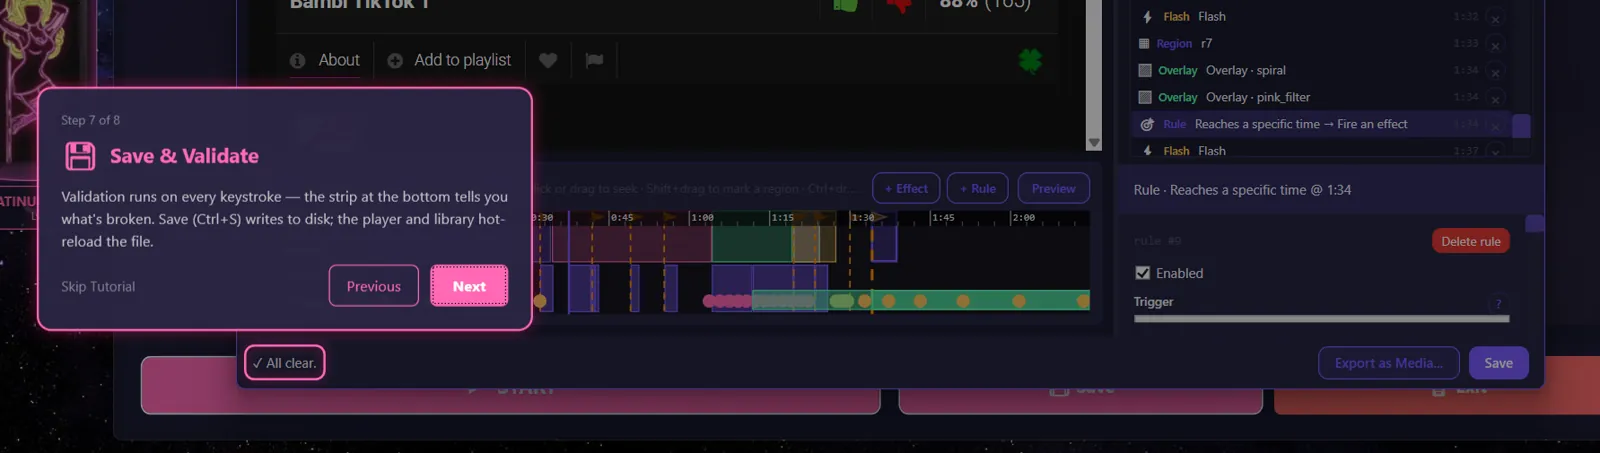
Validation runs as you type. Save with Ctrl+S; the player and library pick the change up straight away.
Step 8 - Have fun
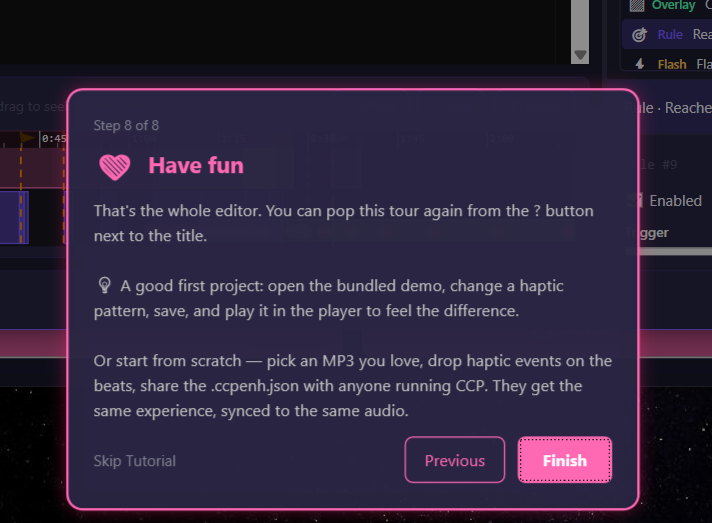
You can reopen the tour any time from the ? button next to the title.
The Player
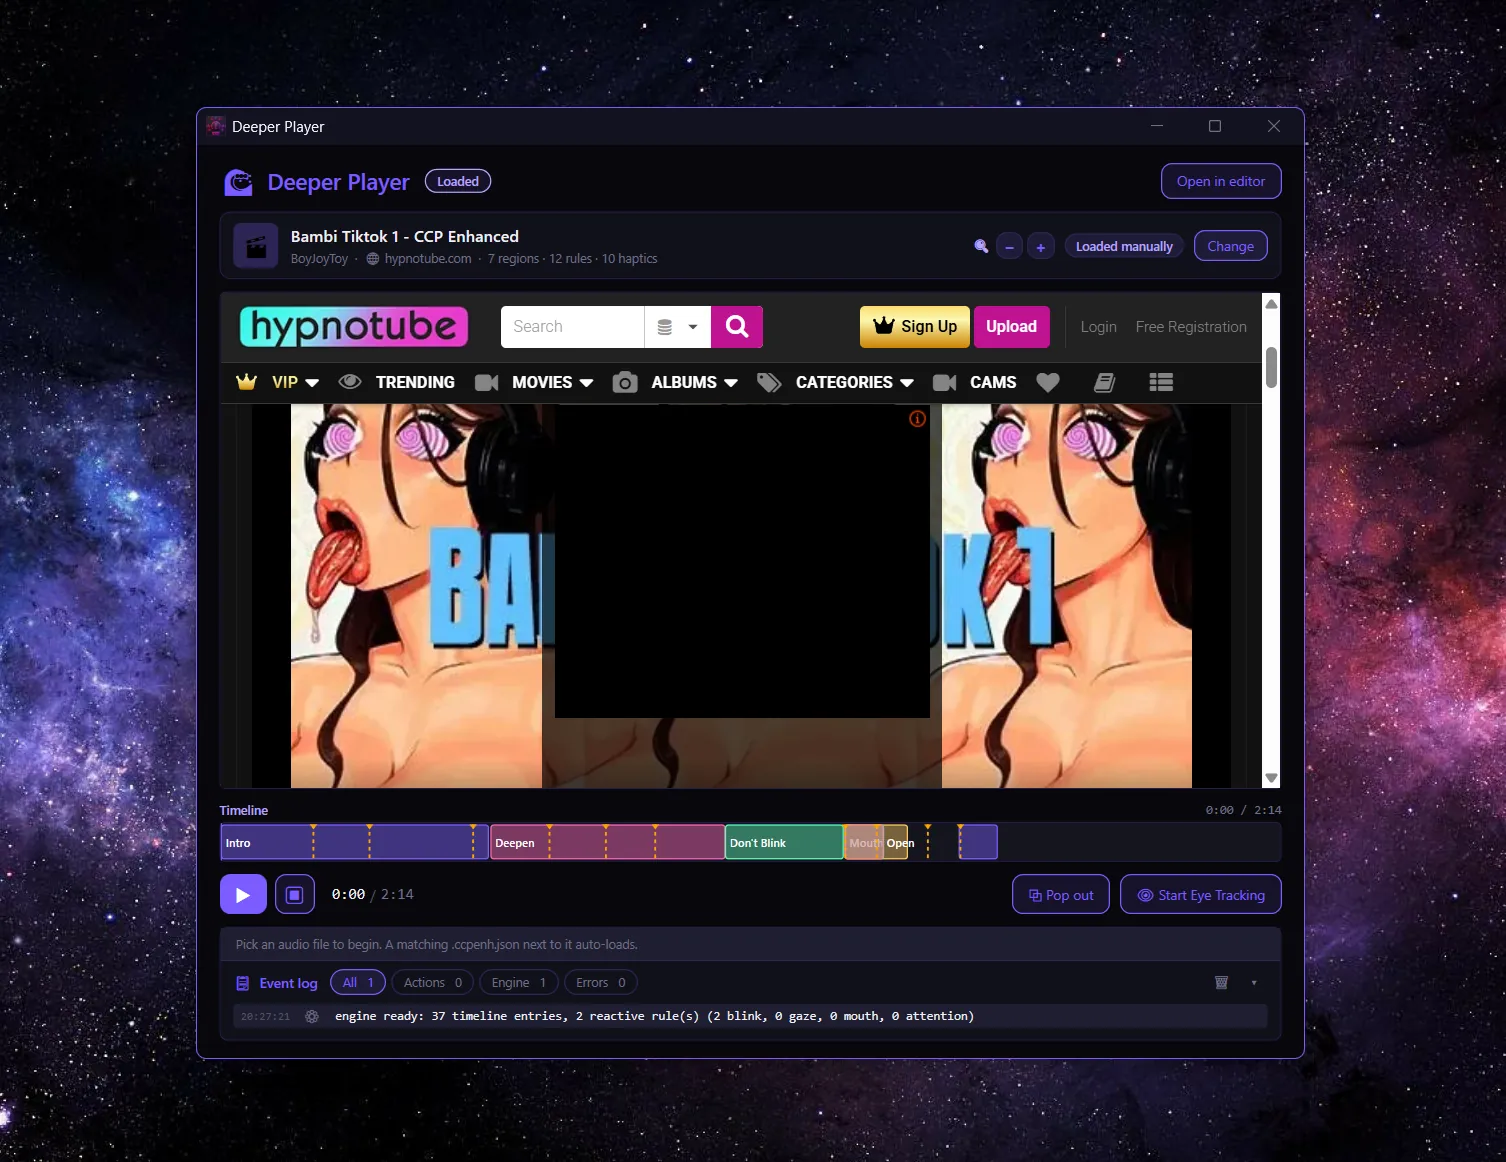
Pick the media, pick the enhancement, hit play. Haptics and rules fire on the timeline as it goes.
Most of the time you won't pick anything. If an enhancement file sits next to your media with the same name, it loads itself. If the media has an enhancement bundled inside it, that loads itself too. A small label tells you where the current one came from: from your library, from a sidecar file, embedded in the media, loaded by hand, or fetched from a URL.
Controls
- Play / Pause / Stop - the usual.
- Seek bar - scrub anywhere. Rules and effects work out where they stand from the new position.
- Volume - just this player. It doesn't touch the rest of CCP's audio.
- 👁 Eye Tracking - turns the webcam on for this playback so gaze, blink and "looked away" rules can fire. Same button turns it off. If the enhancement needs a camera, the player offers this to you before you start.
- ⋉ Pop out - floats the video in a small always-on-top window so it stays visible while you do something else. Click again to put it back.
- Load URL - pulls an enhancement straight from the community catalogue.
- Event log - the last few things the engine fired. The first place to look when an enhancement isn't behaving.
Three ways it plays
Local audio
Audio with a scrolling waveform underneath. Every time-based and haptic rule works; webcam rules need eye tracking switched on.
Local video
Video preview via LibVLC. Everything works, including gaze rules aimed at rectangles on the video frame.
HypnoTube / remote
An embedded browser plays the URL. Gaze rules still work against rectangles drawn over the frame.
First time using webcam triggers?
Camera consent and a one-time calibration have to happen before any gaze or blink rule can fire. Both are free and both are right there in the Deeper tab's Webcam Setup card. Walk through the Webcam & Gaze Tracking guide if you want the detail first.
The Editor
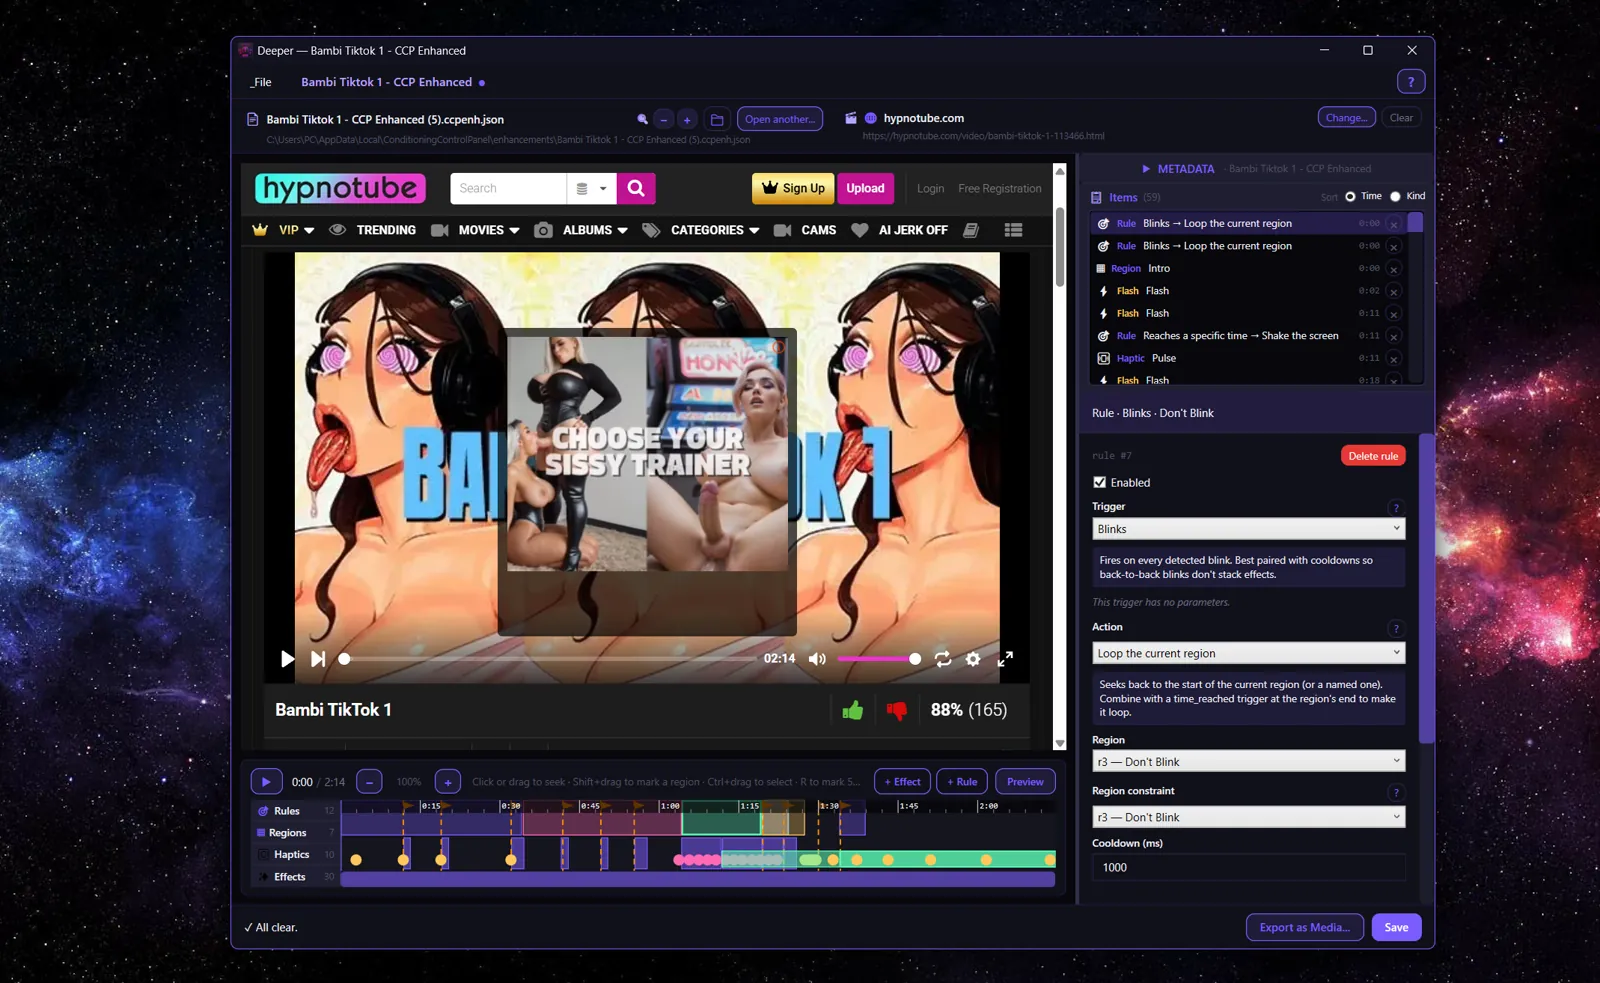
Two columns. Preview and timeline on the left; metadata and the editor for whatever you clicked on the right.
Layout
- Preview (top left) - video frame, audio waveform, or embedded browser, depending on the source. This is also the surface you draw gaze rectangles on.
- Timeline (bottom left) - zoom, scrub, drag things around.
- Metadata (top right) - name, creator, remixer if you're building on someone else's work, description, tags, licence.
- Selected item (bottom right) - the settings for whichever effect, rule or region you clicked.
Timeline shortcuts
- + Effect and + Rule add an item at the playhead.
- Right-click the timeline gets you the same options in a menu.
- Shift-drag marks out a region.
- R drops a five-second region at the playhead.
- H drops a haptic event at the playhead.
- Preview plays the media inline so you can hear and feel your edits in place.
The File menu
Top left of the editor window.
File
  Save                  (Ctrl+S)
  Save As...            (Ctrl+Shift+S)
  ------------
  Export as Media...    (Ctrl+E)
  ------------
  Close
Validation before save
A strip along the bottom tells you whether the file is clean or how many problems it has. Saving and exporting stay blocked until you fix them: a rule pointing at a region that no longer exists, a malformed rule, that sort of thing. Click an error and it jumps you to the item.
Building Blocks
Three kinds of thing live on the timeline. Effects happen at a time you choose. Triggers wait for something. Actions are what happens when a trigger fires. A rule is one trigger plus one action.
Effects
Drop one at a point on the timeline. Six kinds:
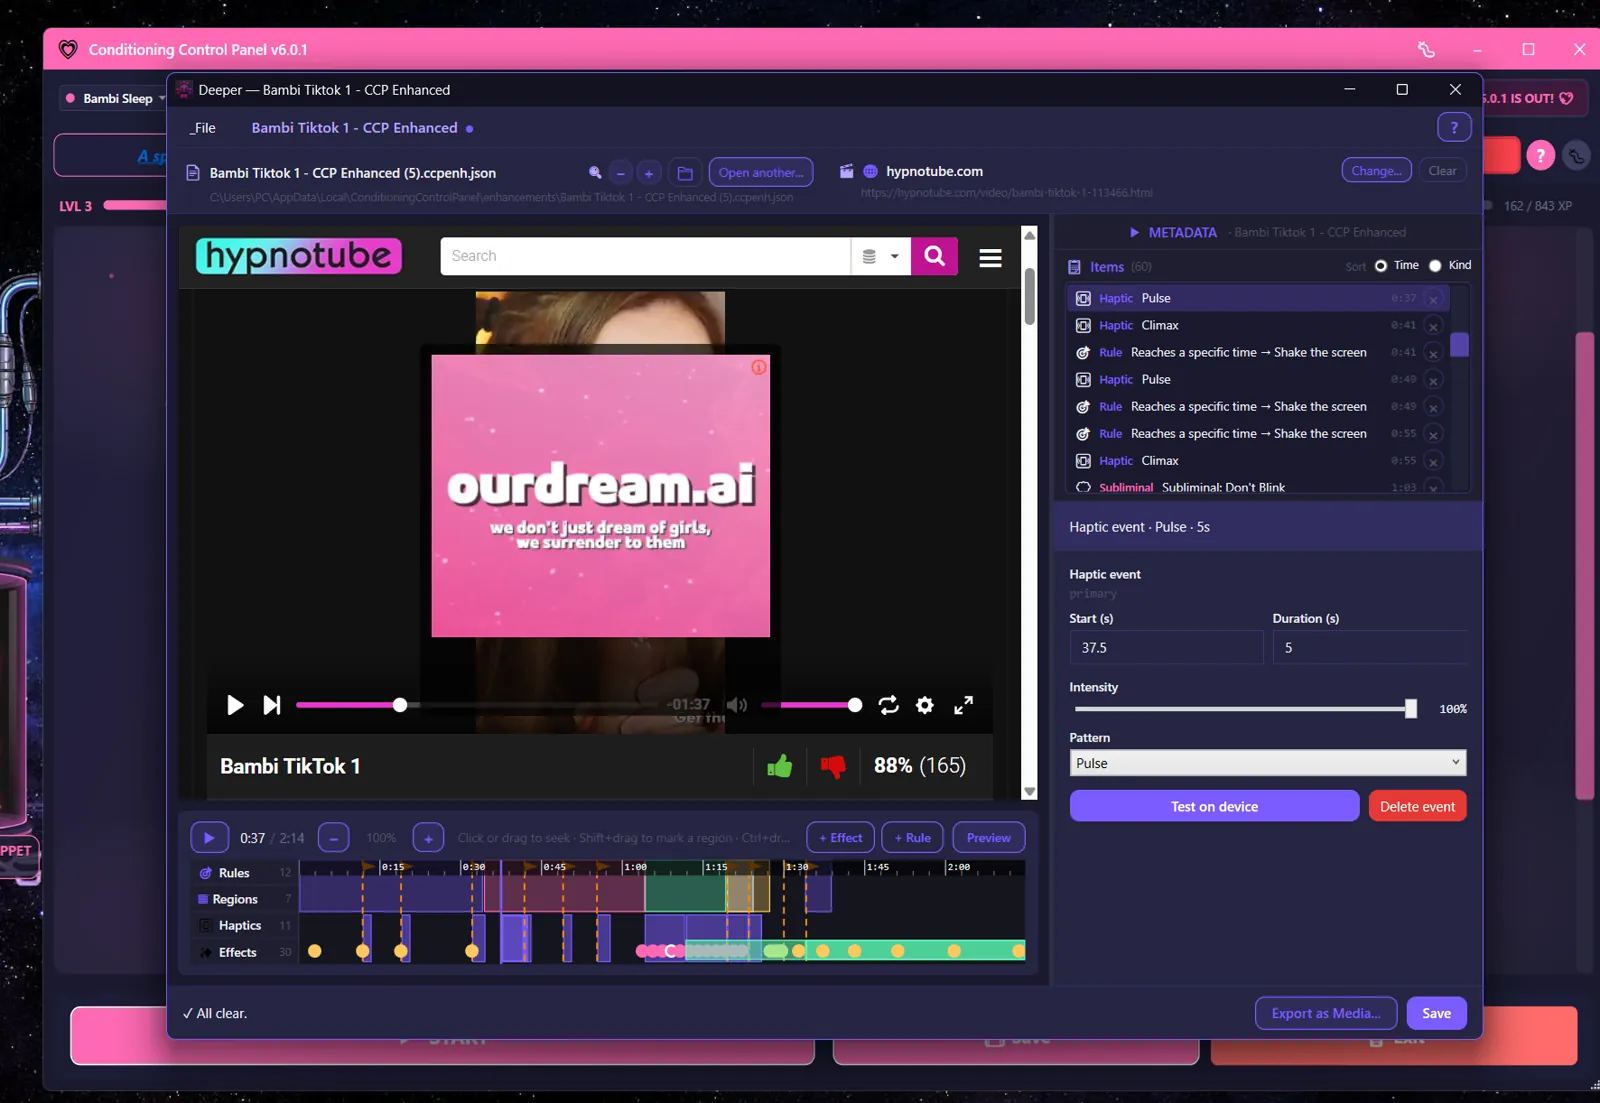
Haptic
A patterned buzz with an intensity curve. Pick a stock pattern or drag your own shape on the curve editor.
Flash
An image flash, using your own CCP Flashes settings. You set how long.
Bubble
A burst of bubbles, using your own CCP Bubbles settings. You set the window and the intensity.
Subliminal
Text flashed briefly on screen. You set the words and the milliseconds.
Overlay
Pink filter or spiral, with an opacity and a duration you choose.
Speak (voice)
Puts a phrase on screen and listens for you to say it out loud, scoring each attempt. Speech recognition runs offline on your machine. Set how many correct repetitions it wants, and whether playback loops, pauses or carries on while it waits.
Brain drain overlays are on hold
The brain-drain blur is being reworked, so it's hidden from the overlay picker and skipped during playback. Older enhancements that use it still load, validate and save perfectly - the blur just won't appear.
Triggers
Eight things a rule can wait for:
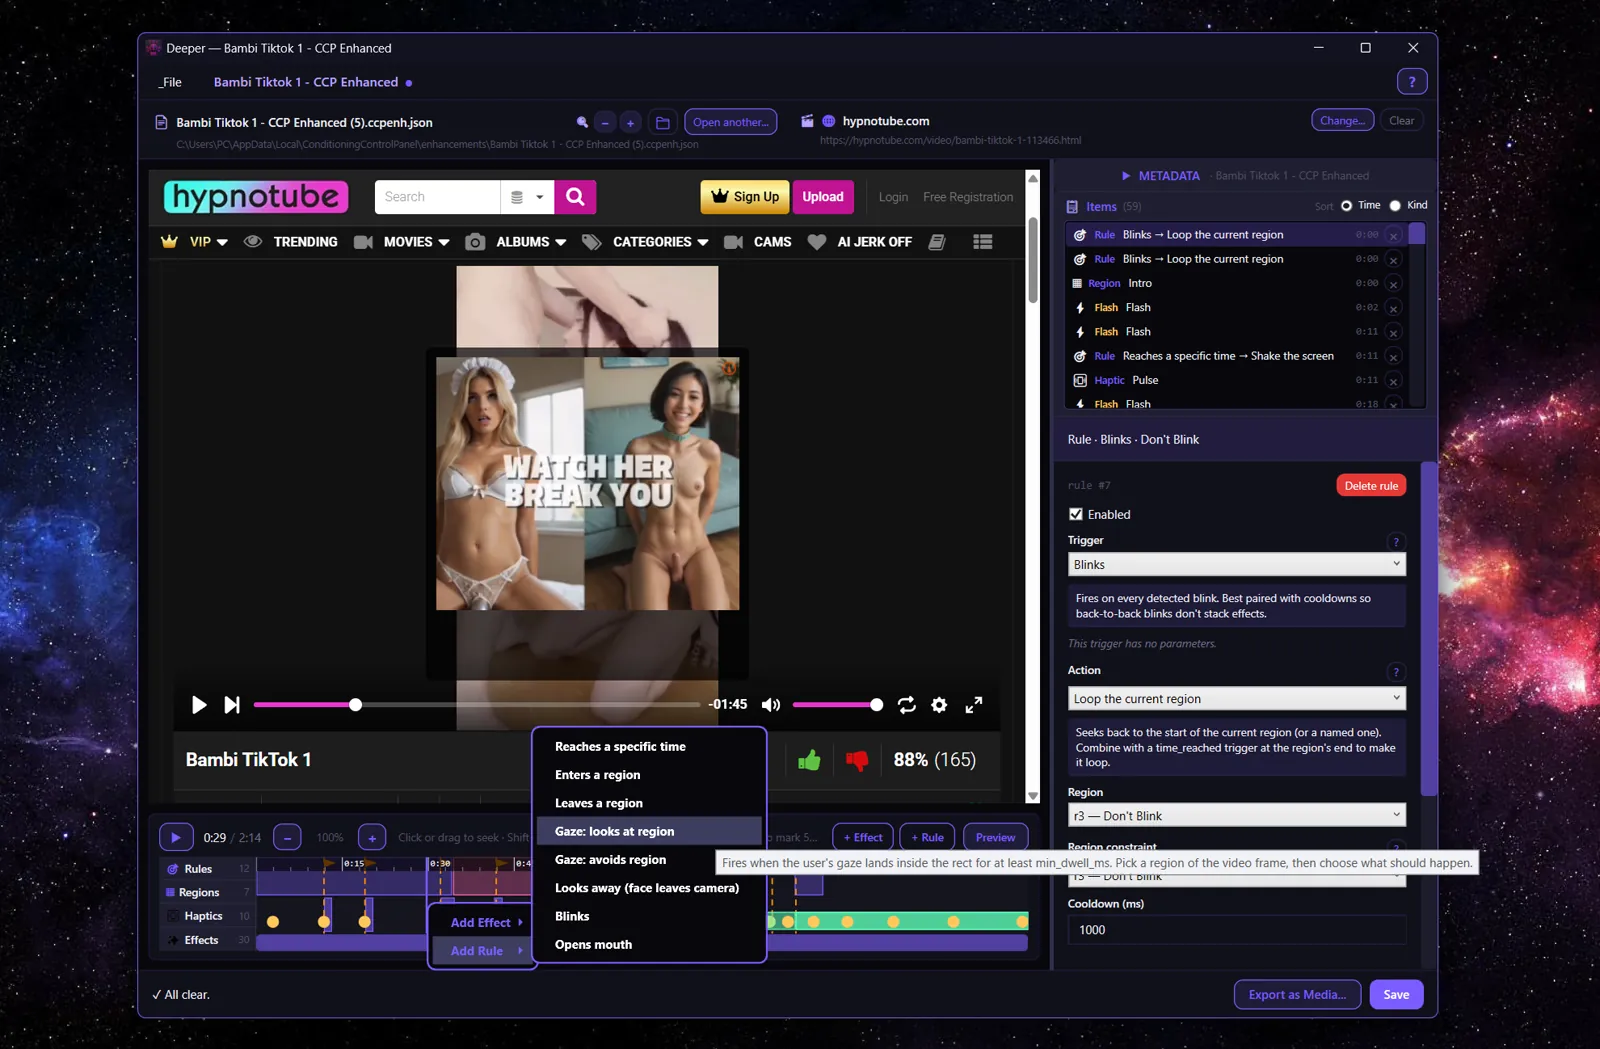
Reaches a specific time
Fires once when playback hits the time you set. The simplest one, and the one you'll use to script a session.
Enters a region
Fires each time the playhead enters a named region. Pair it with the exit trigger for clean setup and teardown.
Leaves a region
Fires each time the playhead leaves a named region.
Gaze: looks at region
Fires when your gaze settles inside a rectangle for long enough. You draw the rectangle on the frame and set the dwell time.
Gaze: avoids region
The inverse. Fires when your gaze stays outside the rectangle for long enough. Good for pulling attention back where you want it.
Looks away
Fires once when your face leaves the camera for long enough and then comes back.
Blinks
Fires on every blink it detects. Give this one a cooldown or effects will pile up on each other.
Opens mouth
Fires when you open your mouth. Add a region constraint if you only want it during certain parts.
Actions
Eight things a rule can do:
Jump to time
Moves playback to a time, or to the start or end of a named region.
Loop the current region
Sends the playhead back to the start of the region it's in. Pair it with a time trigger at the region's end and you have a loop.
Pause playback
Stops the media. You have to press play yourself.
Play an audio cue
Plays a short clip. The path can be absolute or relative to the assets folder. It ducks other audio by default.
Trigger a haptic pattern
Sends a pattern to your connected toy. Stock pattern, or a curve you drew.
Fire an effect
Fires any of the effect types above, with its own settings.
Shake the screen
A brief jolt across every visible window. Higher intensity, bigger jitter; duration sets how long.
Change session intensity
Reserved for later. It's a placeholder in v1 and currently does nothing.
Cooldowns
Every rule has its own cooldown, in milliseconds. Put one on anything that could fire repeatedly - blinks especially - or you'll get effects stacking on top of each other.
File Format & Library
The .ccpenh.json file
An enhancement is plain JSON with a .ccpenh.json extension, on schema ccp-enhancement/v1. Inside: the metadata, the regions, the haptic tracks and the rules. That's everything needed to reproduce it anywhere CCP runs.
- Readable text, so you can diff and merge it in version control.
- Capped at 1 MB, to keep things sane.
- Put one next to a media file with the same base name and it loads automatically when you open that media.
The Library
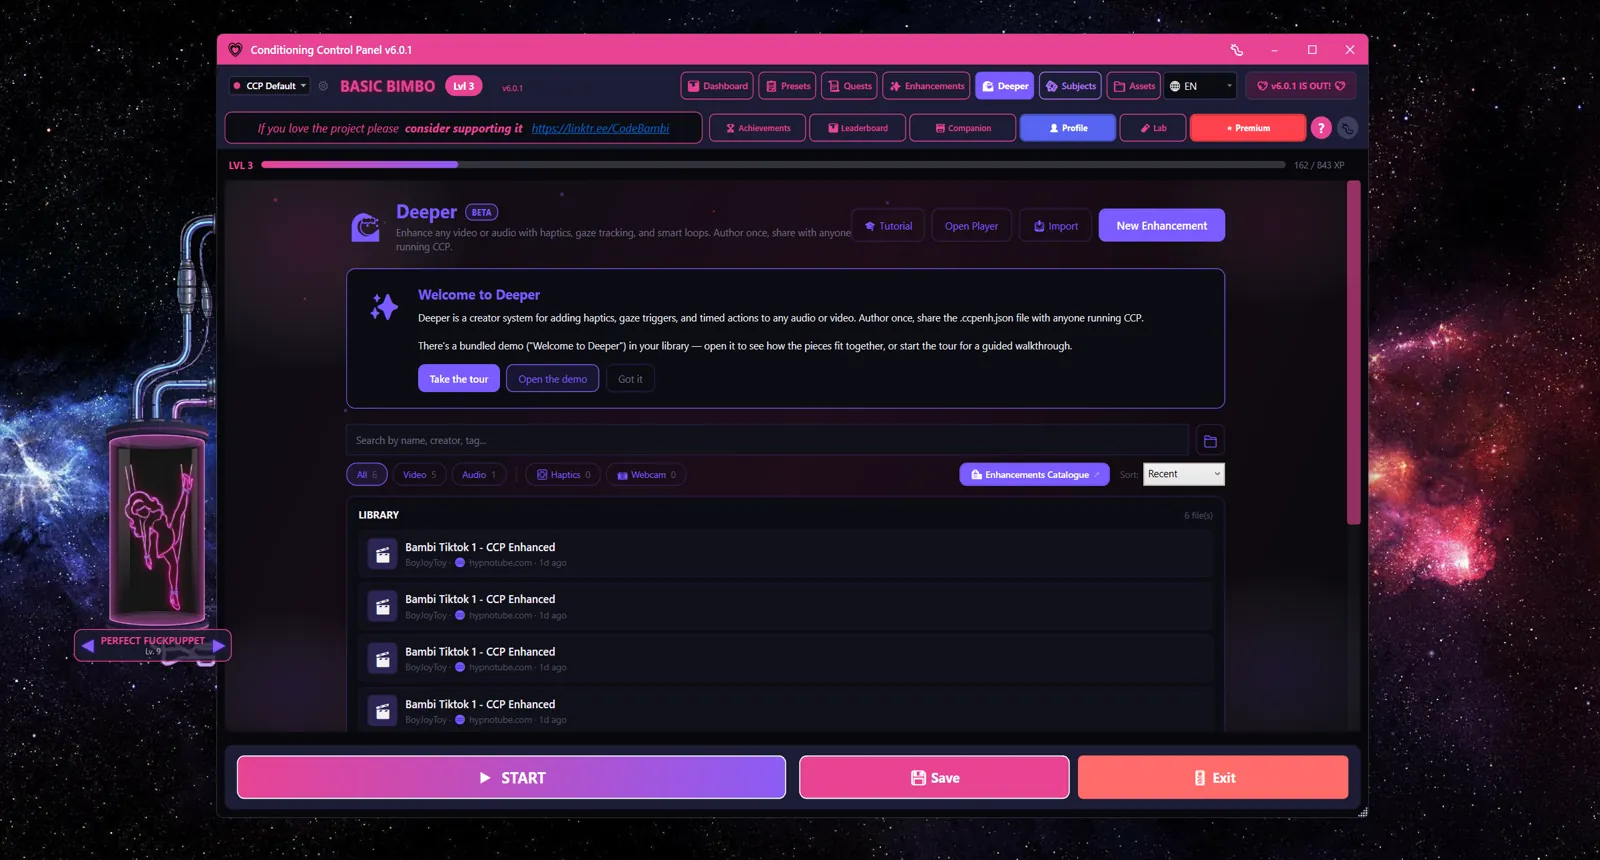
Everything in your Deeper folder shows up here as one list. Search by name, creator or tag; narrow it with the All / Video / Audio / Haptics / Webcam pills, which stack; sort by Recent, Name or Creator. Recent is how you get back to the file you were working on five minutes ago, including files that live outside your library folder.
Double-click a row to edit it. Right-click for play, reveal in folder, or delete. There's also a button through to the community Enhancements Catalogue, and a submit button if you want to share one of yours.
The bundled Welcome to Deeper demo is in there on first launch. Open it - it's a working example with regions, haptics and rules already wired up.
Export as Media
You can bundle an enhancement into a copy of an MP4, MP3 or WAV. It's in the editor under File → Export as Media... (Ctrl+E), or the button next to Save.
The file you get plays normally in any player, and CCP finds the enhancement automatically when you open it in the Deeper player. No sidecar file to remember: hand someone the media and the enhancement comes with it.
Where it hides the data
| Format | Extension | Where the enhancement lives |
|---|---|---|
| MP4 / M4V / MOV | .mp4 / .m4v / .mov | A top-level UUID box at the end of the file. Standard players skip it. |
| M4A audio | .m4a | The same UUID box. |
| MP3 | .mp3 | An ID3v2 TXXX frame described as "CCP_ENHANCEMENT_V1". |
| WAV | .wav | A top-level RIFF chunk called "ccpe". |
How it works
- Validation runs first. If the editor is showing errors, export won't start. Fix them and try again.
- Pick where to save. The exporter copies your source media and tucks the enhancement into a metadata field the format already supports.
- It writes to a temporary file and renames it at the end, so a crash mid-export can't leave you with a broken file.
- Your original is untouched. The new file plays fine in VLC, Windows Media Player, foobar2000 and anything else - they ignore the extra metadata.
- Open the exported file in the Deeper player and CCP finds the enhancement on its own.
This is the good way to share
One file, plays anywhere, full enhancement intact for anyone running CCP. Nothing for the other person to install or line up.
Tutorials
Two walkthroughs ship with Deeper. Both can be re-run from the 🎓 button.
Tab tour (about a minute)
Eight slides covering the player, starting a new enhancement, the library, recent files, search and filters, and Export as Media. It runs itself on first launch; close it and reopen from 🎓 whenever you want it back.
Editor walkthroughs (about three minutes each)
Guided, on-rails walkthroughs inside the editor. Three flavours, so you can pick the one closest to what you actually want to make:
- HypnoTube / TikTok - starts from a sample remote video URL and produces a finished
.ccpenh.json. - Local audio - same thing using a local audio file.
- Local video - same thing using a local video file, and it shows off the "looks away" gaze trigger.
If you'd rather poke at something than be led through it, open the bundled Welcome to Deeper demo, change a haptic pattern, save it, and play it back.
Tips & Limits
- Build gaze rules without a camera. In Preview, press B to fake a blink, M for mouth-open, A for "looks away", and use the mouse as your gaze. You can build the whole thing before you ever switch a camera on.
- Cooldowns matter. Without one, a blink trigger fires effects faster than they finish. Start around 1000-2000ms and tune from there.
- Validate before you share. The bottom strip catches rules pointing at regions that no longer exist. Clear it before exporting.
- Sidecar while building, bundled when shipping. Sidecar files save faster while you're iterating; bundle it into the media when you're done.
- Webcam triggers need a calibration. Free, and set up in the Deeper tab's Webcam Setup card. See the Webcam & Gaze Tracking guide.
- 1 MB cap. Most enhancements are a few KB. If you're anywhere near the cap you probably have duplicates - check the rule list.
- Beta means breaking changes. The file format is stable, but the editor and engine are still moving. If you're collaborating on something with a deadline, agree on a CCP version.
Settings Reference
| Setting | Default | What it does |
|---|---|---|
| Enable Deeper tab | On | Shows the Deeper tab. Turning it off hides the tab without touching any of your files. |
| Recent files | (empty) | Files you've opened lately. Managed for you. |
| Last directory | Deeper folder | The last folder you saved or browsed from. The file picker starts there. |
| Editor sidebar width | 380px | Where you left the splitter between preview and the side panel. Remembered between sessions. |
| Tab tour seen | No | Whether you've been through the 8-slide tab tour. Re-run it any time from the 🎓 button. |
| Editor intro seen | No | Whether the editor walkthrough has run. |
| Welcome demo seeded | No | Whether the bundled demo was put in your library on first launch. |